VSM JSON tree editor#
The tree editor allows you to directly edit the value stream JSON file from the UI.
Use the online tree editor to edit value stream JSON files. Starting with HCL™ Accelerate version 3.0, you no longer need to download the JSON and edit a local copy. Now you can edit value stream JSON files within the product web interface. On the Value Streams page, use the VSM JSON tree editor to edit and save the value stream workflow file. In tree view, the editor allows you to perform the following:
- Change Type, Insert, or Append the Auto, Array, Object, or String field types defined in the following:
- Auto is a field type based on the value of a string, number, boolean, or null.
- Array contains an ordered collection of values.
- Object contains an unordered set of key and value pairs.
- String is a field type not based on the value and returned as a string.
- Duplicate fields
- Extract objects and arrays
- Remove fields
Additionally, you can format, compact, repair JSON data, and save with overwrite protection for simultaneous user editing scenarios.
-
On the Value Streams page, click the required value stream.
-
Click
 and select Edit value stream map to open the VSM JSON code editor.
Note: The JSON code editor is the default view mode when you open the editor.
-
On the right of the
 icon above the code editor, click the Code or Tree view drop-down and select Tree.
The JSON tree editor opens below the drop-down as shown in the figure below.

Note: In the Version history table on the right side of the display, the current version of the JSON shown on the left side of the display is indicated by a vertical blue bar next to the Version field in the table and is the file displayed and open in the editor.
Note: The icons on the left side of the display above the Select a node breadcrumb bar include the following:
- Click
 to expand all fields in the tree view.
 - Click
 to collapse all fields in the tree view.
 - Click
 to undo last action in the JSON tree view.
 - Click
 to redo last action in JSON tree view.
 - On the right of the icon above the tree editor is the Code or Tree view drop-down selector to choose between a plain text editor or a user-friendly editor respectively.
- On the right of the drop-down selector toward the center of the display is the search bar where you can query for fields and values in the JSON tree. On the right of the search bar are the next result and previous result icons shown as
 and
and  respectively. Queried search items found in the tree editor are highlighted for identification.
 -
When you click fields in the tree editor, a breadcrumb is displayed in the Select a node section based on the selected item in the tree view. For example, if you click cycleTime in the tree editor, the breadcrumb is shown in the following figure followed by details:

-
On the right side of object, click
 to display the object hierarchy drop-down list shown in the following figure:
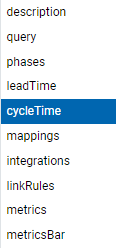
Note: Since cycleTime was selected, it is highlighted in the drop-down list.
-
Click cycleTime in the Select a node breadcrumb bar and that field is highlighted with a yellow rectangle in the editor.
-
On the right side of cycleTime, click
to display the cycleTime hierarchy drop-down list shown in the following figure:
-
Note: The icons in the tree editor below the Select a node breadcrumb bar include the following;
- Click
 to drag and move fields to different locations within the editor.
 -
Click
 to open the actions menu for fields in the tree view. Based on the type of field you click on in the editor, the menus and sub-menus available are detailed in the table below.
Menu Sub-menu Type Auto, Array, Object, and String Insert Auto, Array, Object, and String Append Auto, Array, Object, and String Extract N/A Duplicate N/A Remove N/A Note: Details for items in the table above are located at the top of this page.
-
On the right side of
, icons are displayed that include the following:- Click
 to expand fields in the tree view.
 - Click
 to collapse fields in the tree view.
- Click
- Click
-
To import, download, view, and edit a JSON file in the editor, perform either of the following:
-
Click Import JSON, select the JSON file, and click the Open button.
Note: The file is opened and displayed in the editor.
-
On the right side of the display above the Version history table, click Download JSON to download the latest JSON file revision shown in the Current version field above the creator.
Note: Above the Version history table, you can view detailed information for the latest JSON file with fields including Current version, creator, and file creation day, date, year, and time.
-
In the Version history table with fields including Version, User, Date modified, and Actions, locate the required JSON file version and in the Actions field, click
 and select either View code or Download according to your requirement.
If you want to use a previous version JSON file as the current version, perform the following:
- In the Version history table, click for the required previous version and select Download.
- Click Import JSON and navigate to the downloaded file.
- Click Open.
-
Click Save.
Note: After a JSON file is successfully saved, you cannot revert the changes that were made prior to saving the file. If you want to use a previous version JSON file as the current version, use the aforementioned procedure.
At the bottom of the Version history table, you can perform and view the following:
- In the items per page drop-down, you can select 10, 20, 50, or 100 as the number of items to display per page in the Version history table.
- View number of items listed in the table versus total number of items. For example: 1-3 of 3 items.
- View page number versus total number of pages.
- View the page number currently displayed in the Version history table and click < or > to go to the previous or next page respectively.
- In the Version history table, click
-
-
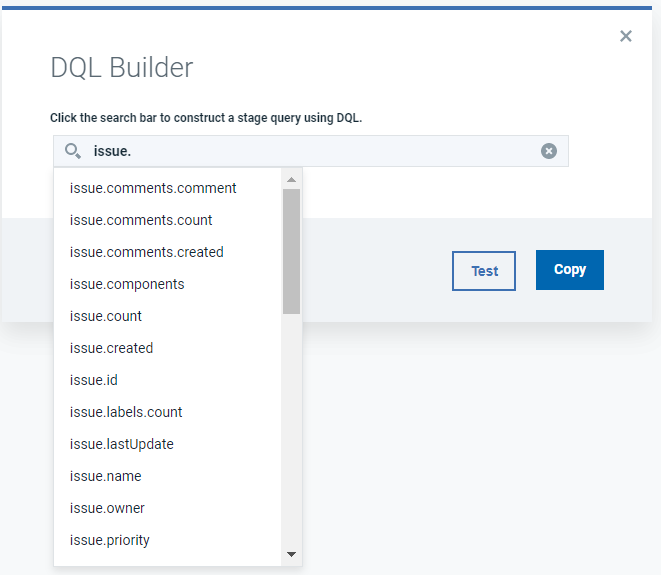
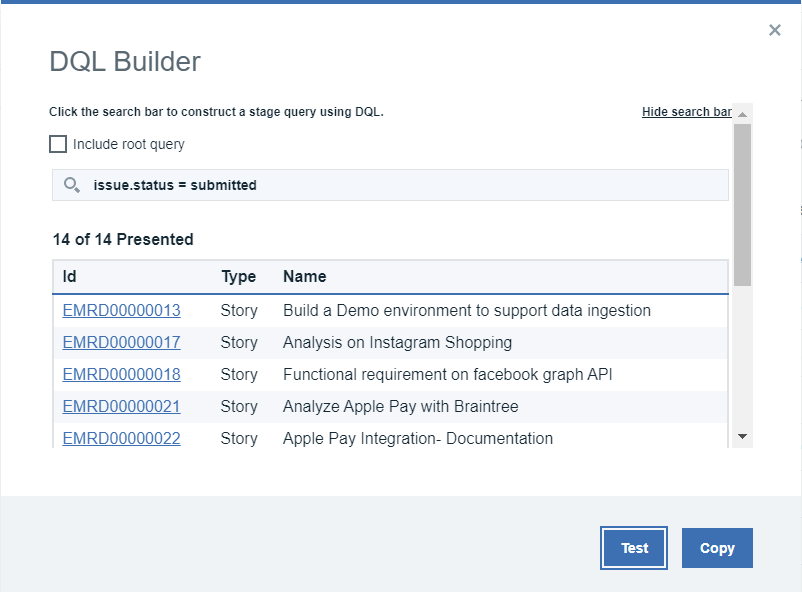
To create a query, click DQL Builder and then DQL Builder window appears. Type the query in search field and select the required one from the list to create query. After creating query, click Test to view results for the selected query. Click copy to copy the created query. You can use the copied query in JSON code or tree editor.
-
On the left side of the display in the file editor, perform the required editing in the file and click Save to capture your changes.
Note: If you make any changes before saving the file, you can click Revert to undo all your changes.
When you click Save, a notification is displayed containing one of the following messages:
- If all the changes you made to the JSON file are validated when saved, a Success notification with a vertical green bar is displayed upon completion.
- If an error is associated with the file, a notification with a vertical red bar is displayed with either of the following information:
- The source of error.
- Selected file type is not supported.
-
Overwrite protection provides visibility to users that attempt to simultaneously edit the same workflow. The following example details the procedure for two users simultaneously attempting changes to the same file. User 1 creates and saves version 78 by editing version 77 and User 2 edits version 77 and attempts to save the file with the result of displaying the OVERWRITE PROTECTION Confirm changes? Users have made 1 new version since loading this page. Do you want to overwrite the latest changes? modal prompting to click either the View latest changes or Confirm buttons detailed in the following table:
Button Description View latest changes Modal closes and refreshes the Version history table with new saved version 78 and the text editor displays the changes made by User 2 for this example. Confirm Saves the changes to version 77 and selects the same version in the Version history table for this example.
Documentation for the VSM JSON code editor is found here.
Parent topic: Customizing value streams