Lesson 3 Integrating tools into a value stream#
Provide data to the value streams by integrating external tools into them, such as Jira.
Before you begin
Before you begin this lesson, make sure that you complete the previous lesson.
About this task
Now that we've configured the value stream, it's time to add data to it.
Where does value stream data originate? The answer is twofold:
- Integrations attached to a value stream define the data sources. A Jira integration, for example, provides Jira project data to the value stream.
- DQL queries determine which records from the data source are selected for the value stream.
In this lesson, we address point 1 by adding an integration to the tutorial value stream.
To modify the tutorial value stream, complete the following steps:
Procedure
-
Click Settings > Integrations > Plugins.
-
On the Plugins tab, click Add Integration for the Jira integration.
Integrations can be defined in several ways. You can define them directly in the JSON file's
"integrations"array. You can also define an integration on the Plug-in page, and then reference it in the JSON file. In this lesson, we configure the integration on the Plug-in page. -
On the Add Jira integration window, configure an integration by completing the following steps:
-
In the Integration Name field, enter a name for the integration, such as "tutorial."
For example,
tutorial Jira. Later, we use this name to associate the integration to our value stream. -
In the Url field, enter the URL for the Jira project that you configured earlier.
The URL is similar to this example, https://my_project.atlassian.net.
-
In the Username field, enter the email address associated with your Jira account.
-
In the Password field, enter the Jira API key that you created earlier.
Because we are using the API key, we do not have to use the other authentication-related fields.
-
In the Projects field, enter your Jira project code.
Make sure to use the Jira project code and not the project's name. In the Jira project I configured for the tutorial, the Jira project code is
DEL. -
Click Add.
The integration is listed on the Integrations page. If the integration is successful, the Status field displays
Online. If the status is notOnline, use the View log option to troubleshoot the integration. You can increase the logging level in the integration configuration if you need more troubleshooting information. -
-
On the Value Streams page, select the value stream that you created in the previous lesson.
-
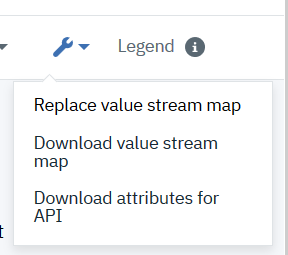
Click Configure value stream map > Download value stream map.
The helloWorld-vsm.json file is downloaded to your computer.
Note: After you modify the default value stream map file, the downloaded file name will reflect the name of the value stream.
-
In your text editor, open the helloWorld-vsm.json file, and then add the Jira integration to the
integrationsarray in the JSON file.Because you already defined the Jira integrations, you can add it to the value stream by referencing its name, as shown in the following example:
```
 "integrations": [
   {
    "name":"tutorial Jira"
   }
  ],
```
Of course, use the name you assigned to the integration in Step 3.
-
In your text editor, add a DQL query to the
Backlogstage in the JSON file.DQL queries assigned to a stage filter the information that appears in the stage, as shown in the following example:
```
 "phases": [
    {
      "name": "PLAN",
      "description": "",
      "stages": [
        {
          "name": "Backlog",
          "query": "issue.status=\"Backlog\"",
          "description": "",
          "wipLimit": null,
          "gates": null
        },
```
It's good practice to escape inner quotes.
-
Save the helloWorld-vsm.json file.
-
On the helloWorld value stream page, select Configure value stream map > Replace value stream map, and then select the JSON file that you modified.
After the file uploads, refresh the helloWorld value stream page. A particle with the Jira status of
Backlogappears in the Backlog stage, as shown in the following figure:
If your Jira project has more than one issue with the status of
Backlog, corresponding particles for all of them appear in the Backlog stage.Select the particle to display a card with information about the particle, including its history. Links to the associated Jira issue are provided.

Results
In this lesson, you integrated the external tool Jira into your value stream and used a DQL query to display data.
What to do next
In the next lesson, we add a DQL query that reflects changes to the integrated Jira issues.
Parent topic: Create a value stream